Nearly every car built since 1995 has a cabin air filter. Its purpose is to catch dirt, dust, and pollen before they reach your car’s interior, where passengers can breathe in particles. Unfortunately, as the filter catches this airborne matter, it gets clogged over time.
This clogging restricts the airflow and efficiency of the heater and air conditioner. So consider the easy DIY task of cabin air filter replacement—to ensure that your heat and AC run efficiently and to keep your car’s interior smelling nice.
Replace your cabin air filter every 15,000 to 30,000 miles, as part of your vehicle’s regular maintenance. If you drive in dusty environments like construction sites or farms, replace the filter more often.
Shop now for car and truck air filters
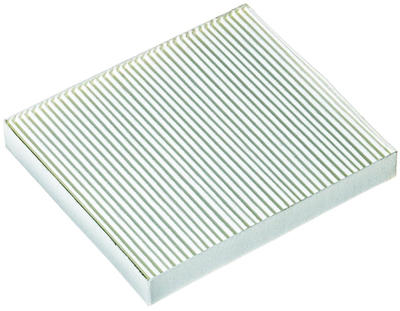
A basic paper cabin air filter
Two Main Types of Cabin Air Filters
The most inexpensive common cabin air filter is made of white pleated paper. It filters particulate material down to about the size of ground black pepper. However, this type of filter does not trap pollen or neutralize odors.
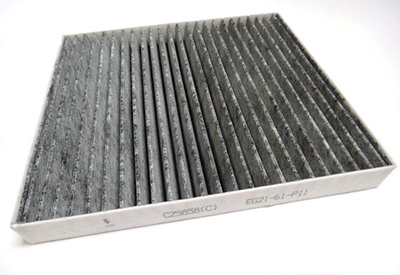
We recommend an activated carbon-charcoal air filter, which is not much more expensive. This type of filter removes fine particulates with a layer of activated carbon. It catches a long list of airborne chemicals and air pollutants, including alcohols, ethers, hydrocarbons, organic acids, and sulfur dioxide.
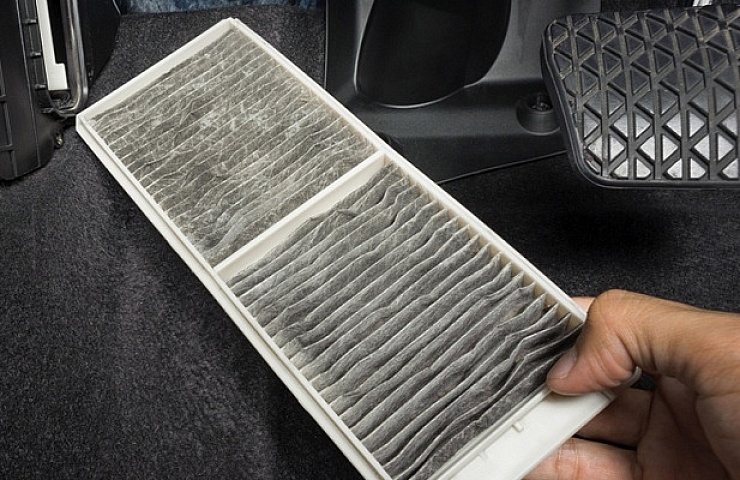
An activated carbon-charcoal air filter also traps odor molecules produced from animals and humans—including cigarette smoke. You can recognize this type of filter by its gray color. You will also see specks of black—the carbon charcoal embedded in the paper material.
While activated carbon-charcoal replacement cabin air filters cost more, they may cure a smelly cabin.
There are also variants of activated carbon charcoal filters, some with high-efficiency particulate air (HEPA) ratings or deodorizing and anti-microbial qualities.
How to Replace Your Cabin Air Filter
Depending on the year, make, and model of your car, replacing the cabin filter can be completed in five minutes—or might take more than an hour of work (even requiring removing the glove box). With most newer cars, the job is an easy plug-in-play operation.
Your vehicle’s owner’s manual will show you where your cabin filter is (and might have instructions for changing it). Because the filter removes the particulates before heating or cooling the air, you’ll find the filter in front of the HVAC fan.
You might be able to access the filter from the windshield cowl—the plastic covering that protects the windshield-wiper assembly—or you could gain access from under the dashboard in the passenger footwell (as shown at the top of this post).
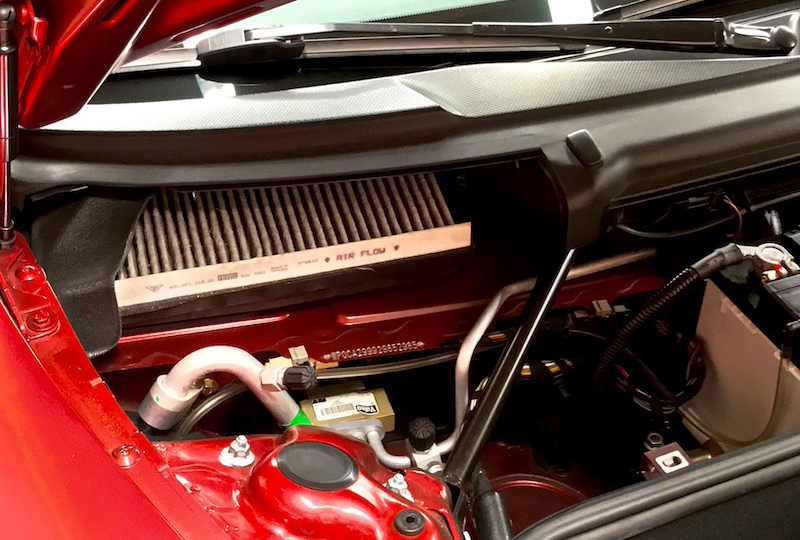
The windshield cowl provides access for this activated carbon-charcoal replacement cabin air filter.
Follow the Flow
To install the filter, pull the cabin air filter out from its housing. When swapping it out, especially an activated charcoal replacement air filter, make sure you insert it with the right orientation. The arrows indicated on the filter should face in the direction of the airflow.
Many new cabin filters come with instructions on how to install them. A quick web search will fill in details about installation for your specific make and model. After you complete the task the first time, subsequent cabin air filter replacements will be a breeze.


