One of the most important things you can do to keep your car running more efficiently is to regularly change the oil and oil filter. Over time, oil breaks down and debris clogs the filter, making cooling the engine more difficult.
Depending on your model and how you drive, an oil change is recommended every three to six months or 5,000 to 7,500 miles. Some cars require a change of oil every 10,000 to 20,000 miles—or 12 to 24 months. It is wise to check your car service manual or consult a mechanic for detailed advice.
Fortunately, it is very easy and inexpensive to change your car oil yourself. Here are the seven essential steps.
Step 1: The Supplies and a Warm Engine


Make sure that you have all the necessary equipment and supplies. Draining the oil is easier if the engine is a little warm, but not hot. During the cold season, you can start the engine and keep it running for a minute or two to increase the viscosity of the oil. In normal sunny weather, this is not necessary.
Step 2: Locate the Oil Plug

Find the oil drain plug located under the car. This should be a large nut under the oil pan just below the engine. If your car is high, you can reach the nut with ease but smaller cars may need to be raised.
If your car needs to be raised, lower the car onto sturdy floor stands placed at the recommended jack points for your car. Do not rely on the floor jack to hold the car while you are underneath.
Push a container under the oil drain plug and make sure that the pan is large enough to take all the oil from the engine.
Step 3: Drain the Oil

Open the hood of the car and then open the oil filter cap on top of the engine. Opening the oil filter cap will help make the oil drain faster as air can flow in while the oil is drained out.
Next, unscrew the oil drain plug gradually but be ready to move your hand out of the way when oil begins spilling through the drain. Wait until all the oil is drained, then remove the pan and place a paper or a towel on the floor to protect the floor from any remaining drips.
Step 4: Remove the Filter

The next step can be tougher. Locate the filter assembly which can be on the front, back, or on one side of the engine. You will need to find the oil filter then remove it from the engine. Removing involves grasping it then twisting in an counter-clockwise direction.
The filter might have a little oil which can spill when you remove it. Remove the filter carefully and then screw the new filter in its place.
Tip: Lubricate the oil filter seal with a few dabs of fresh oil. This will help prevent the gasket from drying and make removing the oil filter a lot easier with your next oil change.
Step 5: Replace the Drain Plug

Replace the drain plug by screwing it into place. Don’t forget to include a new washer or gasket if it had one. Ensure that the threads do not cross. The screw should be snug enough but not too tight. Consult your car’s service manual for the correct torque setting.
Heads up: Don’t over-torque the drain plug.
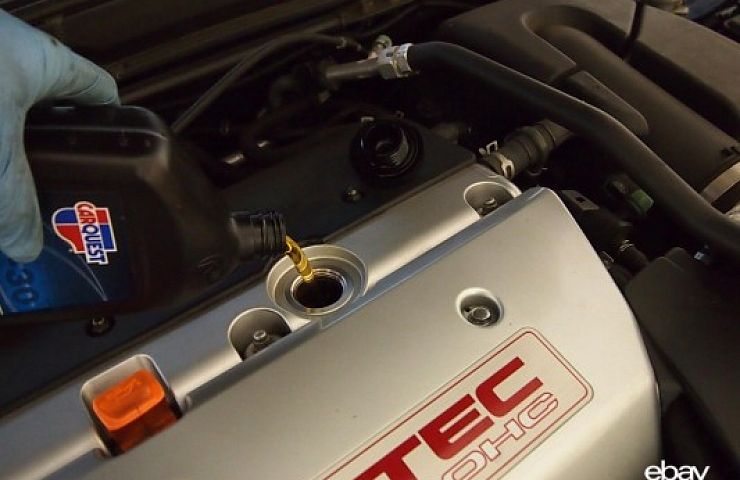
Step 6: Pour New Engine Oil

Use a funnel to pour the new engine oil into the oil filler hole located on top of the engine. The right amount of engine oil is often indicated in the owner’s manual. Do not rely on the oil dipstick, which is not an accurate measure. Pouring the oil gradually and steadily should prevent bubbling and spilling.
Lower the car off the jack stands.
Step 7

Replace the oil filler cap and tighten with your hand. Next, start the car and look under the engine for any spillage. Next, check if the dashboard’s “Check engine” light is on. If the filter and drain plug are tightly in place, there may be a few drops of oil leaks before it stops. Wipe off any leaks then check again after a minute or two.
That wasn’t so difficult.