Contents

Ford C6 automatic transmission park pawl and gear assembly
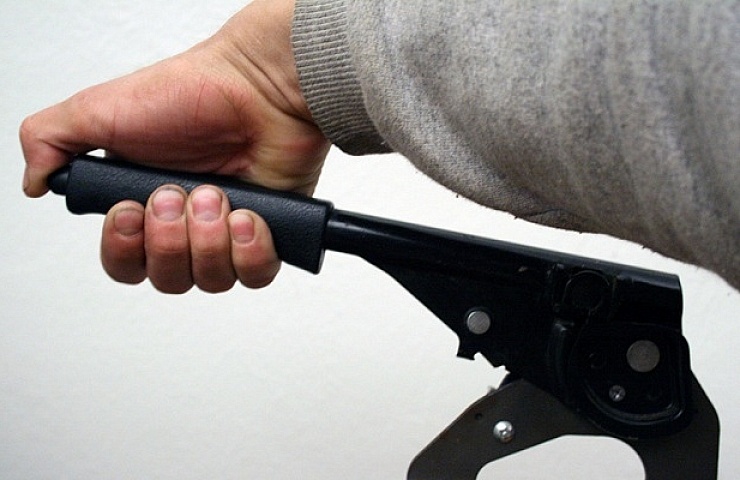
Your parking brake is an essential mechanical device that holds the vehicle in place when parked—and stops it if the rest of the braking system fails.
Although automatic transmissions have a parking pawl (or pin) that holds the vehicle in place, it’s a good idea not to depend on it, especially if you’re parking on a hill. The pawl is about the size of your thumb, which is not much considering the average weight of a passenger vehicle.

Parking brake cable
The parking brake uses a cable to pull a lever on the back drum or disc brake assembly to actuate the brakes. Utilizing the brake every time you park safely holds the vehicle in place. It also prevents the brake from sticking—something you don’t want to experience in a real emergency.
To minimize how often you need to adjust your parking brake, consider using it at least once a week, even when parking on a flat-level surface. To verify if your parking brake needs adjustment, follow these steps:
- Take the vehicle to a location with a gentle slope, away from other vehicles.
- Engage the parking brake and leave the transmission in neutral.
- Wait one minute to see if the vehicle moves. If it does, it’s time for an adjustment.
Adjusting the Brake Cables

Emergency brake adjuster nut
Cables in the parking-brake assembly can stretch over time. When they do, the parking brake won’t engage as easily as it did when the vehicle was new. Some vehicles with hand-actuated brakes have a self-adjusting mechanism that adjusts the cable from under the dash rather than at the brakes.
But if your brake adjusts with a separate foot pedal, you must make manual adjustments. Here’s how:
- Release the parking brake.
- Jack up the vehicle’s rear and secure the rear wheels on jack stands. (Never use a floor jack to hold the vehicle in place for a repair requiring you to be under the vehicle.)
- Chock the front wheels to prevent them from rolling.
- Clean and lubricate the threads on the cable adjuster.
- Back off the cable adjuster nut on the passenger side at the vehicle’s midpoint or beside the parking brake lever.
- Loosen the adjustment so there is slack in the cable.
- Finally, tighten the nut until you feel a slight drag on the rear wheels.

Parking brake cable adjuster
Bryan Wood, online content editor for Haynes manuals, told us:
It is important to keep your parking brake properly adjusted. When you make the adjustments, you’re better off with it slightly loose than with it dragging and burning up your brakes. Always test after adjusting the brake to be sure it isn’t dragging.
Brake Shoe Adjustment
If your vehicle is equipped with drum brakes, the parking brake shoes may also require adjustment. Although brake shoes are self-adjusting, the mechanism can become gummed up or worn out.
- To adjust the shoe, loosen the cable assembly so there is some slack.
- You might need to remove the wheel to access the star adjuster, or you may be able to access it through the brake drum backplate.
- A brake spoon has bends to help you access the adjuster if it’s in a hard-to-reach place.
- Refer to your owner’s or shop manual to determine which direction to turn the adjuster to tighten the shoe. It willvary depending on which side of the vehicle the adjuster is mounted on.
- After you shorten the star adjuster, you may need to move the shoes to fit the drum back on. You can adjust the shoes using a couple of flathead screwdrivers.

Electronic parking brake assembly
Cars with Electronic Emergency Brakes

Brake adjustment tool
These days, manufacturers commonly equip vehicles with electronic parking brakes. These electronic brakes use a computer to apply the rear brake pads, either through a traditional cable mechanism or actuators that push the pads against the rotors.
- The advantage of electronic parking brakes is that they automatically release when the driver moves forward.
- The disadvantage is that they’re harder to service and require more equipment.
Typically, these systems are self-adjusting. Working on them requires a scan tool and skills that might be beyond the reach of the weekend mechanic. Take note: If your battery dies while the electronic emergency brake is on, the rear brakes won’t release. Releasing the brakes requires a special tool and jack stands.


